Thursday 26 April 2012

D'Arcy's diaries mid challenge reminder

**This card was scheduled to post on Thursday 26th April, but I am having lots of problems with the new Blogger and every card I have scheduled so far hasn't actually posted I have had to go in and do it myself. Unfortunately I've had a lot going on this week and today is the first time I have been on the computer since Wednesday, so I am really sorry it's so late**

We are halfway through our colour combo challenge of either Pink and Cream or Blue and Cream, last week I went with the blue and cream combo, so this week I have used pink and cream.

I pleated a strip of paper and attached it down the side of my card, I also made a small concertina flower and put it in the middle of my Woven Circle die cut.


Image - DD_037 - coloured in photoshop
Papers - Various Nitwits kits
Dies - Memory Box Woven circle, Spellbinders Label 22
Punch - EK success - Arch scalloped 
Ribbon and button - MeiFlower


I have been loving the purple tips in Jesse J's hair when watching The Voice, so decided to give my image some pinky red ones.

Don't forget to pop over to the challenge blog and check out what the rest of my teamies have been up to.

hugs,
Colette xx

Tuesday 24 April 2012

Robert Jackson Guest Desiger

Woohoo!!! I was lucky enough to be chosen as the winner of the first Jackson's Digital Expressions challenge with my Diva card, as well as winning five fabulous digi images I also got the chance to be a Guest Designer for this week's challenge.

The challenge is
CAS (Clean and Simple)

I was told last week what the challenge theme would be, but once I had coloured my image and was thinking about what to do for my card I completely forgot that it was CAS (had a blonde moment LOL!) and ended up making a card that was as far away from CAS as a card could be.
 Yesterday whilst checking the challenge blog for some info I needed I suddenly realised that it was a CAS challenge and my card was totally unsuitable. I quickly printed out my image again and put together a more suitable card, this is what I came up with.

Image - The Bride and Groom - Robert Jackson -Coloured in Photoshop
Martha Stewart Border Punch - Garden Trellis
Ribbon and charm - MeiFlower
I punched some small circles from pearl paper and then cut and rolled them to make the roses.
Now I'm not really a CAS type of girl and I found it hard to stop here, I would have liked to at least add something in the corners and dot crystals around the trellis, but managed with great difficulty to stop myself!

I thought I would also show you my first attempt as a good example of how NOT to do CAS, LOL!

There are a couple of pics so that you can see the whole card in all its UN-CAS glory!
(Sorry the pics are a bit dull, just couldn't get a good photo)
See if you can tell the difference - hehe!

Image - The Bride and Groom - Robert Jackson - coloured in Photoshop
Papers - Bohemian Paper Pack- Clipart Fairy
Border punch - Martha Stewart Garden Trellis
Wording - computer generated
Card shape - Go Kreate - Arched Window dies
Leaves - CREAlies CLCS11
Ribbon, gems, silver sequin blossom, pearl hearts - Meiflower
Flowers and oval pearl string - Stash
The trellis is covered both inside and out with groups of three silver sequin blossoms, it also has an organza bow each side. The brides dress is decorated with tiny gems and glitter, There is a floral arrangement on the card as well as a sentiment, so it definitely couldn't be called Clean and Simple LOL!

Pop over to the challenge blog and check out the fabulous creations by the design team, and make sure to have a look around the store at all of Robert's fantastic images and drawings.

Thanks for stopping by
hugs,
Colette xx

Monday 23 April 2012

Clipart Fairy Trio

I've been busy over the weekend playing with some of the Clipart Fairy's new releases, there are some gorgeous new images in store and each comes with a few matching papers.

Here I have used Cute Carly, No1 Bear and Babeasaurus.


I made the scalloped circle in Photoshop, and added various papers from the kit. Carly's boot, head and arms are decoupaged and I added tiny stick on pearls for her bracelet. I cut slots in the card front and threaded ribbon through and then tied a large key charm onto the bow. Between each ribbon loop I placed a stick on pearl and used lots of glamour dust to make the whole card sparkle. I also gave Carly glossy lips with Glossy Accents
Image and Papers - Cute Carly - Clipart Fairy
Ribbon, Pearls and charm - MeiFlower
Dies - Go Kreate scalloped circle, Spellbinders circle
Wordart - computer generated
  For No.1 Bear I made an easel card using various papers from the kit. The bear is quite large and although he comes with decoupage layers I didn't decoupage him (the kit also contains a shaper set). I added gold glitter around the centre of the rosette and over the No.1 and gave him a shiny nose with Glossy Accents.
Image and papers - No.1 Bear - Clipart Fairy
EK success border punch - Pawprints
Grosgrain ribbon - MeiFlower


For this card I once again made the shape up in Photoshop, the scalloped circle is the same as the one on the Cute Carly card but resized and decorated with papers from the Babeasaurus Kit. Once again there is quite a bit of glamour dust on this card, along with buttons, a dummy charm and a lush wide satin ribbon bow. There is decoupage for the baby in the kit, but I printed out a few extra images and layered it up the way I wanted it.
Image and Papers - Babeasaurus - Clipart Fairy
Buttons, dummy and ribbon - MeiFlower
Wording - Computer generated.

There are quite a few new kits in the Clipart Fairy store and more being added every day, so pop over and check them out.

Thanks for looking,
Colette xx

Thursday 19 April 2012

D'Arcy's Diaries New Releases

Today is new release day over at D'Arcy's Diaries and to go along with the new releases we have a new challenge starting too.

This time around we have a colour combo challenge, you get to pick between
Pink and Cream
or
Blue and Cream

The winner chosen by the design team will be able to choose five D'Arcy images.

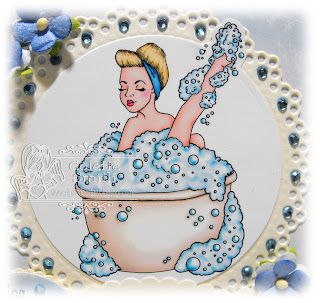
I loved this image of the girl in the bath, with all the suds and bubbles and decided to go with the Blue and Cream combo.


Image - DD_038 - Coloured in Photoshop
Papers - Clipart Fairy - Gorgeous 5
Sentiment - Freebie - Create with TLC
Martha Stewart - large scallop border punch
Die - Marianne Craftables CR1201
Spellbinders - circle, scalloped circle
Gems - MeiFlower
flowers - Stash


I am going to enter this card into the following challenges
Whimsy Inspiration -#35 punches/diecuts 
Craft Your Passion - Die Cuts and Punches
Incy Wincy Designs - Digi`s ONLY
Lexi's Creations - 2W - (1st week) Use Your Punches and Dies (ends 28th April)
Make it Monday - always Anything Goes
Paper Sundaes - 3E, C10 - Anything Goes


and don't forget to pop over to the challenge blog and see what fabulous creations the rest of my teamies have managed to come up with.

hugs,
Colette xx

Tuesday 17 April 2012

Teddy Bo Tuesday - Does my bum......

...look big in this?!!! As soon as I saw this weeks new releases with this image of Jolly, that sentiment sprang into my mind, I thought he really did look as if he was checking out his bottom and worrying about whether that little bow makes it look big!

Along with  the new releases it is also the start of our next challenge this time hosted by Team B and the theme this time around is 
Pink and Brown
it couldn't be simpler just use those two colours on your card or project, easy peasy.

Although it's not my teams turn I just had to colour up this fabulous image and play along.


Image - TBB_123 - coloured in Photoshop
Digital Kraft card - Pink Petticoat
Patterned papers - Clipart Fairy - Yummy 6 and More Yummy 6
EK Success border punch - Arch Scalloped 
Word art made by myself
Ribbon and metallic cord - MeiFlower

I made Jolly a little tail with metallic cord (all I could find in brown in my stash)
and tied a little bow around it.

Check out the rest of this weeks new releases

and pop over to the Teddy Bo challenge blog to see Team B's fabulous creations.

Thanks for stopping by,
Colette xx

Monday 16 April 2012

Oh what scrap!

I was tidying up my craft table yesterday, putting left over pieces of printed card and papers into my scrap box, when I came across two pieces of scrap card that must have been left over from a recent card, mmmm, I thought to myself, I could make a quick card with those.
I have recently purchased a Die-Versions Happy Birthday die and hadn't had a chance to play with it yet, so I grabbed it, along with the scrap card, some scrap pearl paper, my Big Shot, a Sizzix sizzlits die that I have had in my collection since I bought my very first die-cutting machine the Sizzix sidekick, a crown charm and some stick on gems. It took me about 20 minutes to put together, and here is what I came up with.

The die is quite big, (the finished card measures 15cm square and the die nearly fills it), and perfect for a quick card, there must be lots different ways you could jazz it up.

Lilac and plaid scrap - Gorgeous 5 - Clipart Fairy
Pearl paper - local craft shop
Die-Versions Happy Birthday Solo Sentiment 
Sizzlit - Princess
Crown charm and stick on gems - Meiflower.

I added tiny purple and Aurora Borealis stick on gems to the crown and used tacky glue around the flat edges on the back of the crown to stick it into place on the card.

Thanks for stopping by
Hugs,
Colette xx


Sunday 15 April 2012

Clipart Fairy - Dougy

Today I have two cards to show you suitable for a young boy. I used papers, images and a shaper set from the Clipart Fairy's Dougy collection.

For my first card I used the Dougy shaper set xtra, but me being me it looks nothing like a shaper card!
I re-sized the plain shaper to fill an A4 piece of card width-ways. The patterned shaper I made slightly smaller. I decided to use the fancy frame as a mat for one of the Dougy goes to school images, and I made my own word art. I inked around the edges of everything with a creamy brown ink pad and then scored and folded the plain shaper in half to make a tent fold, I cut the patterned shaper in half and attached to the front and back of the card base. I attached the fancy frame with double sided tape, cut around Dougy leaving a white edge and fixed him into place with a layer of foam pads, the word art was fixed with a double layer of foam pads.


My second card is an easel card, made using Dougy papers and an image from Dougy's pets. I made my own ribbon slider for the sentiment.
 When closed this is a 15cm square card, Dougy is the full height of the card when closed. I have attached him to the front section of the easel card and then cut around him and along the crease, so he stands out from the easel.
Gingham ribbon - Meiflower
Gold card candy - stash

You can find the whole Dougy range here.

Hugs,
Colette xx

Saturday 14 April 2012

Clipart Fairy - Button Babies

Here is a sweet little baby card I made using some Clipart Fairy goodies.


Image - Button babies Everyday - Clipart Fairy
Papers- Button Babies Everyday Papers - Clipart Fairy
Sentiment - Freebie - Create with TLC
Ribbon, dummy and gems - Meiflower.

I used the stripes as a guide to punch holes, through which I threaded the ribbon, adding the dummy charm to one of the loops as I went along.


Hugs,
Colette xx

Friday 13 April 2012

Diva!

Yesterday I came across a digi store called Fine Arts by Robert Jackson, as well as a large collection of digital stamps there are some fabulous pencil drawings and paintings by the same gentleman. It's definitely worth popping over and taking a look, and make sure you check out the graphite drawings section.

A lot of the digital stamps are of an Ethnic origin, but there are also a lot of other bits and pieces that are suitable for everyone, check out the shoes and also the hats in the Come Sunday category.

I have been looking for an image to go with a freebie Word art that I picked up from Create with TLC a couple of weeks ago, and I found just what I was looking for in store.

Now I may have mentioned one or twice that I am freaked out by images with no mouths and this one has no facial features whatsoever, so is extra freaky to me, but I love the pose and the haughty way she has her nose in the air (if she actually had a nose LOL!)
I have added some glamour dust to her wrap and blinged up the top of her dress and headband, after all every Diva needs a bit of bling!

Image - Diva - Robert Jackson - Coloured in photoshop
Word art - Freebie - Create with TLC
Martha Steward Border punch - half daisy
Stick on Gems - MeiFlower

I am going to enter this card  into the following challenges

Do You Stack Up? - Glitter/bling
Digistamps 4 Joy -  #40 glitter and bling
365 Cards - fill the card with a single image
Anything Goes Challenge - #64 Anything goes
Make it Monday - always Anything Goes

Thanks for stopping by
Hugs,
Colette xx

Thursday 12 April 2012

For those awkward teenage boy cards......

When the D'Arcy's Diaries new releases came out last Thursday I was torn between the mermaid ( I love mermaids) and the boy, the mermaid won, but this week I decided that I just had to use the boy. I think this is a fabulous image, perfect for all those awkward male teenagers and young adults.

Image - DD_020 - Coloured in Photoshop
Paper - Freebie - Create with TLC
Music note border and Word art - Musical Melody Scrapbook kit
Ribbon, buttons and charm - Meiflower


I used a small black button and a gingham button, (turned over to the plain white side) and threaded a piece of beading wire through the charm loop and both sets of buttonholes twisting it on the back to hold into place. The whole lot is then attached to the card on a foam pad.

There is still time to enter D'Arcy's latest challenge, which is Flower Power - use at least three flowers on your project (oh dear, there is none on mine, but it is a boy card, so I'm sure I can be excused). 

Hugs
Colette xx


Wednesday 11 April 2012

Clipart Fairy Diva Time

I have finally managed to get some Clipart Fairy cards made, I was planning to do them on Sunday, but with not being well  I didn't get around to it, I had them all ready to print though, so today I printed them out and managed to make two of the three I had planned.

I have decided to spread them out, so today you get to see just one of them.


I played with the Double up Kit -Diva Time 2 and made a shaped card. The background paper, scalloped ovals, word art, shoe and bag are all part of this interactive kit, along with more backing papers and bits and pieces to make a double up card plus a tutorial to show you how.
Along with a blank oval there is an oval with the shoe design already on it plus the decoupage, I added the bag (which comes as a separate piece in the kit) to the oval too.
I glamour dusted quite a bit of the pattern on the background paper as well as around the scallops on the ovals, decoupaged the shoe and then covered it with red sequin blossoms, doing the same on the bag pocket. Both the ovals are attached using foam pads so the card has quite a bit of dimension to it.

Double up Kit Diva Time 2 - Clipart Fairy
Glamour dust

Thanks for stopping by,
Colette xx

Tuesday 10 April 2012

Hugs and Kisses

Did you have a lovely Easter? I spent Easter Sunday in bed with an upset tum so am a bit behind with my blog work,  feeling much better today, so I'm hoping to catch up in the week.

As today is Tuesday it can only mean one thing, time for Teddy Bo, the new releases are now fortnightly so we get more chance to play with them.

We are halfway through the Spring has Sprung challenge, so there is still time to get your entry in if you want to be in with the chance of winning the Teddy Bo 10.


On this card the back is square (with rounded corners) and I made a scalloped heart template for the front, cut out, then hinged the two together with some strips of card glued to the back of the heart and the back of the card, which have then been covered with patterned paper.
This is how it looks when closed

and here it is open

Image - TBB_120 - Coloured in Photoshop
Digital Papers - Echo Park - Springtime
Word art - freebie - Create with TLC
Die - Memory Box - Marietta buckle
Flowers - stash
sequin blossoms and orange pearls - MeiFlower

Thanks for dropping by
Colette xx


Saturday 7 April 2012

Diamond Jubilee 2


Following on from Wednesday's jubilee card, here is card number two. This time around I made a Jubilee stamp. 
The Queen's head was taken from this picture of one of only four plaster-casts made of the Queens head by sculptor Arnold Machin, and is the image used on all the Royal Mail stamps.

I used Photoshop to extract the background so I was left only with the head, I added the wording and then turned it into my Jubilee stamp by attaching it to an X-Cut postage stamp die.

I used small pieces of red, white and blue 10mm ribbon for the bunting,

The rosette was made by gathering up lengths of ribbon and joining them into circles, the red layer was made from wide satin ribbon, the white and blue layers from 10mm satin ribbon. The white layer was gathered loosely and then attached to a small piece of scrap card, to make a circle slightly wider than the tightly gathered blue layer.
Paper - Clipart Fairy - Modern Heritage CD
X-cut nesting dies - Postage Stamp
EK success - Arched scallop punch
All ribbons and gems - MeiFlower

This afternoon I'm off to the theatre with my friend Julie, her mum and daughter, we are going to see the King and I. When I was growing up I used to watch all the old musical films with my nan on the telly on Sunday afternoons, and I have quite a large collection of DVD's starring Gene Kelly, Fred Astaire and Ginger Rogers, Bing Crosby, Frank Sinatra, Judy Garland, Danny Kaye etc., but The King and I was always one of my favourites, so I am really looking forward to seeing it as a theatre production.

Have a lovely weekend
hugs,
Colette xx

*** edited to add *** I have now put the stamp up as a freebie, if you would like it go to this post HERE

Thursday 5 April 2012

It's Flower Power over at D'Arcy's Diaries

We have our new challenge starting over on D'Arcy's Diaries this week, and the theme this time around is

Flower Power
you need to use at least 3 flowers on your project.

Unfortunately due to unforeseen circumstances, and also in my case, internet problems, we didn't get hold of the new images until yesterday dinner time, which meant not a lot of time to put a card together.

I fell in love with this mermaid image (it comes without the bubbles too) and she was such a breeze to colour, although I really wish I had more time to put the card together as I feel this card doesn't do the beautiful image justice, but it was the best I could do in the time I had.


Image - DD_032_with bubbles - coloured in Photoshop
Blue, silver and cream pearl papers - stash
 Marianne Dies - Chinese Roses - Leaves set and Anja Edge
Spellbinders Dies - Oval and Scalloped Oval


Here is a close-up of the mermaid in all her luscious gorgeousness, she looks very pink on my screen, but I can assure you she doesn't look like that in real life). I will definitely be using her again as I want to try and make a card more fitting for her.

Pop over to the D'Arcy store and check out the rest of this week's new releases, there is a fabulous male image that you are going to need to get, he is just perfect for those awkward male cards, go check him out!


Thanks for popping by
hugs,
Colette xx

Wednesday 4 April 2012

Diamond Jubilee

I wanted to show you a card I have made to celebrate the Queen's Diamond Jubilee this year.
I decided to make the Union Jack from 10mm satin ribbons, and use a fabulous large crown charm that I found on Mei's store at the Leigh craft show as my only embellishment (well apart from some sparkly gems, it is her Diamond jubilee after all LOL!).
I actually ended up making two cards as in the middle of this one I had an idea for a second, which I will post in a couple of days.


Dotty paper - found in scrap box not sure where it came from.
Red metallic card - local craft shop
Scalloped oval - Nellie Snellen multi frames dies - Oval 13
Oval die - Spellbinders
Wording - computer generated
10mm satin ribbons, 4mm satin ribbon, crown charm and gems - MeiFlower

I added tiny gems to the crown, a large one over the hole that the charm would usually hang by and a couple either side of the wording, 

I was really pleased with the way the Union Jack turned out, and I even made sure that I had it the right way up, (I didn't even know there was a right way up until I did some research before I made my card LOL!)

Colette xx

Tuesday 3 April 2012

Teddy Bo Tuesday - Spring has Sprung!

It certainly feels very Spring like at the moment, we have had some beautiful Spring sunshine over the last week or so, the cherry and plum trees in the park opposite my house are full of blossom, our pond is full of tadpoles and lots of my plants have new buds on them, yes, Spring is definitely in the air!

Which brings me neatly on to the Teddy Bo Challenge, this time around hosted by my team, Team A, and you've guessed it the theme is...
Spring has Sprung
we would love you to show us what you can do with flowers and Spring colours.

I've gone a bit yellow this time around, not a colour I tend to use much, but a perfect colour for a Spring themed card.

 Papers - Spring has Sprung and Simply Flowers - Clipart Fairy
Swirls - Catalina Wreath and ornate swirl - Memory Box
Ribbon, sequin blossoms and tiny gems - MeiFlower
 I have used one of this weeks new images - TeddyBea_198 - Coloured in Photoshop
and made my own word art, the flowery font is - Floralies - dafont.com


Here are the new images in store this week and if you are looking for dies or other crafting goodies check out the craft section, great prices and free p&p in the UK.

Pop over to the Teddy Bo Challenge Blog and check out all the fabulous creations from the rest of my team, and don't forget to enter our challenge the first prize is the fabulous Teddy Bo 10, but you've got to be in it to win it.

All entries must be in my Midnight GMT Sunday 15th April 2012

Hugs
Colette xx

Sunday 1 April 2012

Clipart Fairy Grin and Bear it1

A bit late but finally here, I have been struggling all day to get this done, but have so much going on that it's taken me a while.

Did you see Will's Egguarium a few posts back, well I'm pleased to report that he came first in the egg decorating competition and is chuffed to bits with his prize of a Thornton's egg, which his mum has put away until Easter, he's promised me a little nibble as I helped him, isn't he kind LOL!

My mum will be celebrating her 70th birthday on Thursday, unfortunately my aunt (step-dad's sister) passed away last week and her funeral is on the same day as my mum's birthday, so it has put a bit of a downer on it for her.

Hopefully her pressie will cheer her up a bit, I've bought her a Kindle as she loves to read, I just need to get a few books loaded up on it for her now.

For her birthday card I decided to use the Clipart Fairy's Grin and Bear it Shaper kit.
I resized the shaper to make an eight inch square card.
 I printed the shaper section out twice, cut around both pieces and then scored in about 2.5cms from the left hand edge of one. I used double sided tape to stick the scored section to the back of the second shaper, matching up the edges, to make my card base. The shaper topper I printed quite a bit smaller as I wanted to attach it to the left had side of the card and leave some space down the right hand side for my rosettes.
I used some papers from Nitwits Grin and Bear it Kit for the swirls, letters and to make the rosettes, punching a scalloped edge first before folding and making up.
Card kit - Clipart Fairy - Grin and Bear it Shaper Set
Extra papers - Nitwits - Grin and Bear it Collection
Border Punch - EK success - Arch Scallop
Swirls - Marianne Creatables - Frame circle 112
Die cut letters - Sizzlits - Yarn alphabet
Ribbon and Pearls - MeiFlower

I hope she likes it and manages to enjoy her birthday even with the funeral.

hugs,
Colette xx