Wednesday 29 February 2012

Too Busy!

I had so much going on last weekend that I didn't get time to do any Clipart Fairy cards, I have managed to catch up a bit and have a couple for you today, using some of her new Double Up kits, one a Ready to print version, which I have made up more or less exactly as the instructions included with the download say, (very easy to follow instructions with photos). My second uses one of the interactive versions and from the parts included I have made up a card of my own design.

Double-ups have a scalloped oval shaped front and then on the back there is rectangular card, which opens up to hold an insert and space to write your message..
Kit - Clipart Fairy - RTP double up card - Boy button it
the only extra things I added were lots of Glamour dust and some gorgeous little flower sequins from MeiFlower for the flower centre. I just splodged a big dollop of tacky glue (any wet glue would do) into the middle of the flower and then added the sequins one at a time with tweezers.
 Here's the reverse of the card, showing the second card on the back and also a side view to show how it all goes together. I used a concertina of card inside mine to stop it from splaying as opposed to the ribbon method that is shown in the tutorial.
a close up of the tiny flower sequins attached to the centre of the flower.

~~~~~~~~~~~~~~~~~~~~~~~

My second card uses the Interactive Double Up card - Rosie 1, 
I will add a link as soon as it goes into the store.
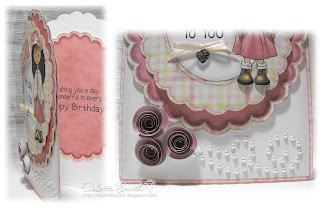
I used parts of the kit to make up my card front, which I printed out on the right hand side of a piece of A4 card. I folded the card in half, and held it together with pegs, whilst I cut around the shape, through the two layers. I added the toppers and decoupage to the front using foam pads. The pearl swirl was made using a Bazzill Jewel template and self adhesive pearls  from MeiFlower and the rolled roses were cut by hand from pearl paper printed with one of the colours from the card. A small bow and made with love charm (also from MeiFlower) were added under the wording, and there is lots of Glamour Dust around the scallops and Rosie's outfit. I also added a small white flower sequin to her hat.

Here is a close up of the pearl swirl, charm and flowers, and a side view of the card to try and show the layers.

Thanks for looking,
Colette xx

Tuesday 28 February 2012

Teddy Bo Tuesday

Can you believe that it is almost the end of February, except that it's a leap year, today would have been it, February over and done with. It only seems like five minutes ago since we were celebrating Christmas and in another five minutes it will be Easter LOL!

Today we are half way through the latest Teddy Bo Challenge, Swirls and Pearls, which is being hosted by Team B, (I'm on Team A), so although I have a card to show you using one of this week's new releases, it doesn't actually follow the challenge, as there is not a pearl or a swirl to be seen LOL!

I decided to make a pop-out stepper card, as I think the last one of these I made was Christmas 2010, although this time around I thought I would have a go at making the pop-out section a circle, instead of the usual square/rectangle. I think it turned out OK.

Image - TBB_111 - coloured in Photoshop
Papers - Clipart Fairy - A big hug
Die cut heart - Joy Craft - 6003/0005
Butterflies - X-cut punch
Border - Martha Stewart - half daisy border punch.
Inked around edges in Colorbox fluid chalk ink pad - creamy brown.
Metallic cord, charms, gem and fabby gingham buttons - MeiFlower


I've put a small gusset inside the card to stop it from splaying, so have attached the message panel to the back. I added a pink gem to the middle of the flower charm, and gorgeous gingham buttons to the die cut hearts. A little "handmade with love" heart charm attached to the label is the perfect finishing touch.

I am going to enter this card into the following challenges

Make it Monday - always Anything Goes
Pile It On - Fun Folds

Check out this week's fabulous new releases in the Teddy Bo store.

If you are looking to make Mother's Day cards then these are perfect.

Pop over to the Teddy Bo Challenge blog and check out the fabulous creations from my teamies.

You have until Sunday 4th March Midnight GMT to enter the Swirls and Pearls challenge and be in with a chance of winning the fantastic Teddy Bo 10.

Just a quickie to let you know that Mei has set up a design team blog here, you will find quite a few of the cards I post on here on it as well as some other fantastic creations from the other DT girls. Check it out.

Colette xx

Monday 27 February 2012

Diamond Anniversary - maybe?

In July of this year my mum and dad in-law will have been married for an amazing 60 years. I want to try and make them a really special card and have decided that over the next few months I will try out a few different ideas and see which I like best, as it's their diamond anniversary I definitely want plenty of bling, so here is my first attempt.


I thought that black and white would look quite classy so I embossed black card cut it into four strips and attached them to the front of a square card blank, attaching them alternately as embossed and de-bossed (the other way over LOL!). I added a die cut border along the bottom, covered with wide black organza ribbon and then made a bow to attach to the right hand side using a diamanté ribbon slider. I made up a lollipop flower using 5 circles, 3 plain and 2 patterned, crumpled them up, unravelled them, joined them all together with a brad in the centre, crumpled them up and unravelled them again, then attached the diamanté heart to the centre. The swirl was die cut and then glittered before attaching behind the flower. A couple of extra gems finished it off.


Embossing folder – Crafts Too – Daisies
Flourish Die – Memory box – Madera corner
Border Die – Marianne – Anja Lace
Wording – Peel Off
Digi patterned paper – Pink Petticoat
Diamanté heart, ribbon sliderribbon and gems – MeiFlower


Not sure yet if this is the look I am going to go for, or if I prefer a card with an image, but I still have plenty of time to try out different things.

Colette xx

Saturday 25 February 2012

Baby Girl card

Following on from yesterday's post, here is my baby girl version of the card.

Digi Kraft paper – Pink Petticoat
Embossing Folder – CraftsToo – swiss dots
Wording – computer generated
Die – Spellbinders – Eyelet squares
Martha Stewart border punch – Layered arches
Polka dot ribbon, pearls, pink cord, buttons and dummy– MeiFlower


After attaching the polka dot ribbon to the punched border I fed the pink cord through the buttons, spacing them equally as I went. Once I had the cord through the first hole of the middle button I added my dummy and tied a knot to hold it in the correct position, then I fed the cord through the second hole and added the final button. I use a small piece of red double sided tape to the back of each button, stuck them into place on the polka dot ribbon and then attached the ends to the back of the punched border with a bit of tape.

Colette xx

Friday 24 February 2012

Quick and easy baby card

I wasn't really planning on doing a post today, but yesterday I put together this quick baby card. I decided not to use an image and just go with some wording, a bit of embossing and some embellishments. I was really pleased with the way it turned out so thought I would show it to you.


Digi Kraft card - Pink Petticoat
Wording - computer generated.
Embossing folder - Crafts Too - Swiss dots.
White organza ribbon, It's a  boy ribbon, pearls, button, string and dummy - MeiFlower.

As I don't have any split rings or chain to attach the charms I am always looking at different ways to do it. On this card I threaded cord through a buttonhole, slid the dummy onto the cord and then threaded it through the other hole and pulled it tight, I then punched a small hole into the card where I wanted my dummy to go, threaded both ends of the cord through and pulled is so that the button sat flat against the card. A piece of tape over the ends of the cord at the back, secures it into place.

Top tip - when using cord or anything similar that is made up of strands, and especially when you are trying to thread it through small holes -  use your fingers to spread a little PVA glue over the cord where you are about to cut, give it a minute to dry, and then cut through the middle of the glued area, it stops the strands from unravelling and keeps the end a bit stiffer, making it much easier to thread.

I've now also done a baby girl version, embellished slightly differently so will pop that on tomorrow.

Colette xx

Thursday 23 February 2012

D'arcy's Diaries New Releases

How are we all this Thursday morning? looking forward to the weekend which will soon be here? I'm not sure that I am, my daughter is off to a hen weekend and I have the "pleasure" LOL! of looking after my grandsons. Will is staying on Friday night, which is his regular night to stay, then Charlie will be arriving at about 11am on Saturday and I will have both the boys here until late afternoon when Neill, their dad, will be coming to take Will for a sleep-over at his friends, meanwhile Charlie will be staying here until Sunday. Not much rest and relaxation (or card making) will be happening here I think.

It's new release day over at D'Arcy's Diaries today, so let's take a look at the new images available.


and here's my card

 image - DD_019_02 - A gentle touch coloured in Photoshop
Digi papers - Kraft Capers and All Things Bright - both from Jessica Sprague
Teal and Taupe ribbons, Metal butterfly and self adhesive gems- MeiFlower

I thought this image would also be ideal for a Mother's day card for expectant mums, what do you think?

I thought the metallic butterfly perfectly matched the colour of the taupe ribbon and I added a few black, blue and Aurora borealis gems to embellish it. The gems on the ribbons are an exact match for the taupe ribbon.

Pop over to the D'Arcy's Diaries blog and check out the work of my fabulous teamies.

Colette xx

Tuesday 21 February 2012

Teddy Bo Tuesday

This week over at Teddy Bo we have a new challenge starting and the theme is.... 
Swirls and Pearls
We are hoping to see lots of cards with beautiful swirly swirls, die cut, paper patterns, anything with a swirl on and embellished with pretty pearls, not too difficult is it and you could be in with a chance
of winning the fabulous Teddy Bo 10, your choice of 10 Teddy Bo digi images,
including any of this week's new releases.


It is actually team B's turn to host the challenge this week, but I always like to have a card to show you on a Tuesday, so here is what I came up with.

I love this image of Oliphant in the Easter Egg, although how big that egg must be to fit an elephant in doesn't bear thinking about, mmmmmm imagine how much yummy chocolate it would contain though. I hope it's Galaxy chocolate, my favourite!


No wonder Oliphant has that little smile peeking through behind his trunk, who wouldn't be smiling surrounded by all that chocolate! I just hope he hasn't done any elephant business in there LOL!

Digi Kraft papers - Pink Paislee Kraft Capers Paper Pack - Jessica Sprague
Circle dies - Spellbinders
Pearls and ribbon - MeiFlower
Pearl Swirl shapes made using Bazzill Jewel Templates 

Don't forget to pop over to the Teddy Bo Challenge Blog and check out the fabulous creations by team B. You have until Sunday 4th March midnight GMT to enter the Swirls and pearls challenge.

Sunday 19 February 2012

Clipart Fairy February workshop

Yesterday I went to this month's Clipart Fairy Workshop where we made a selection of cards with some of her new products. In our packs we also had a couple of extra bits which were printed by mistake, I used them once I got home to make a couple of extra cards.

The Workshop Cards.
Check out the New Products section in both stores for the interactive and RTP versions of these kits.

 This was a large wallet card, which would make a perfect gift set, as inside it has two pockets that you could fill with a selection of cards and envelopes. We made a matching card as an example.
The top frill sticks out from the card and the roses are decoupaged and glittered.

~~~~~~~~~~~~~~~~~~~~~~


A pretty easel card, with roses and butterflies, the roses and top wings of the butterflies
are layered up for extra dimension.

~~~~~~~~~~~~~~~~~~~~~~

This is a large 20cm square ready made scalloped edge card base decorated with papers and images from the Mannequin kit. The frame was made with a GoKreate die,
flowers from WOC and the scissors are from MeiFlower.

~~~~~~~~~~~~~~~~~~~~~~
This card uses pretty peach rose paper and a roses and butterflies graphic, which is decoupaged. The shaper frames are part of the kit. There is also an insert included in the kit, which for our card was printed on vellum.

~~~~~~~~~~~~~~~~~~~~~~
An ideal man's card with a fun sentiment that continues onto the card insert.

~~~~~~~~~~~~~~~~~~~~~~
This is a 5" x 7" card, with decoupaged roses. I added a peel-off sentiment to the middle of the tag, (in the kits you could add your wording using the computer) and some pearls dotted around the roses.
Pearls - Meiflower
~~~~~~~~~~~~~~~~~~~~~~
In our packs we had a couple of extra pieces including this oval and circle with decoupage from the Antique Roses Kick Frill Interactive Kit. 
When I got home I decided to use them up, so here are the cards I made with them.
Papers used are all from the kit.
I used the oval to make an A6 Mother's Day card adding a bow, a charm, pearls and peel-off wording


I cut the circle with roses out, and used it as a template to cut a second circle from blank card. I scored the blank circle at approximately 2cms in from the left hand edge and attached it the the rose circle, then trimmed a small straight edge across the bottom of the card to make it stand. I decoupaged and glittered the roses, and added a purple bow, and pearls to decorate. The tag is from the Mannequin interactive kit, I re-sized it and added my own wording.
The Ribbons, Pearls and charm used on these two cards are from MeiFlower.
~~~~~~~~~~~~~~~~~~~~~~

It was as always, a very busy but enjoyable day and I would like to say a big Hi! to everyone who was there, especially the mad lot that I share a table with, Oh, and an extra special thank you to Anita who supplied us with a big box of Thornton's chocs to munchie on while we were working.

Also check out this fantastic offer at MeiFlower
25% off Satin Ribbon

Ooooh and my wonderful hubby has just come in, from fixing my daughters cooker, and handed me a Tesco carrier bag telling me he's bought me a present, inside is my very own Kindle  WooHoo! he's is definitely the World's Best Husband!

Hope you've enjoyed today's selection
See you soon
Colette xx

Friday 17 February 2012

Teddy Bo Friday?!?!?!?!

With everything that's been going on I missed Teddy Bo Tuesday and as it's Fairytale Friday today, I thought this would be the perfect opportunity to show my latest Teddy Bo cards.

I planned on stitching the charms into place, but got carried away and ended up
stitching all the papers together and the word sew in the sentiment too. 
Image - TB_188 - coloured in Photoshop
Digi Papers - Black Leaf SewCraft papers - MyGraphico
Silver letters - peel offs
Purple pearls, buttons and charms - MeiFlower

~~~~~~~~~~~~~~~~

How cute is Bea in her bunny costume?
Image -TB_187
Digi papers - Mels Brushes Easter Eggs Collection - MyGraphico
Ribbon, Ribbon Slider, pink string and buttons - MeiFlower

Don't forget to check out Fairy tale friday, where you can catch up with the happenings at Teddy Bo Towers and also see some more fabulous inspiration from my teamies.

I'm off to a Clipart Fairy workshop tomorrow, was umming and aahhing about going with Meg still not being a 100% but my hubby says it will do me good to get out for a while so I'm going.
Will be back over the weekend to show you what we made.

Colette xx

Thursday 16 February 2012

Back at last.....

.....has anybody missed me?!
Unfortunately my youngest daughter Meg ended up in hospital last Sunday 5th February. She had the chest infection that seems to be going around, (the whole family have had it) but because of her disability (she has Arthrogryphosis - and in her case it affects every joint apart from her jaw, (she can talk the hind leg of a donkey LOL!) and her elbows), which leaves her unable to move or do much for herself, and the fact that she also has a scoliosis (curve of the spine) which causes her lungs (one more than the other) to be squashed, if she gets a chest infection it is hard for her to shift it and this time around it turned into pneumonia, so all in all she has been quite ill, needing IV antibiotics and oxygen for the best part of a week. Although at 21 she is now an adult, the hospital have been brilliant and let us spend all day, every day with her, from about 7.30am until about 10pm.
Meg finally came home a couple of days ago, and is feeling much better and brighter, especially as she is at home with all her own things around her. She has just about finished the cocktail of meds she was on and is starting to get back to her old self, I know this because she has started giving cheek again LOL!

We were so tired when she finally came home (funny how tired you get sitting around doing nothing all day!) that we didn't have the get up and go to do much, but after a few good sleeps and a day or two of taking it easy I am ready to get back at it!

Today I have four cards, some of them were supposed to be for the new D'Arcy's Diaries release last Thursday, but I suppose a week late is better than not at all so here goes.

image - DD_014 - Cupcake Queen - coloured in Photoshop
Papers - Nitwit Collections - Hey Cupcake
Martha Stewart border punch
Sentiment - computer generated
Metallic cord, cupcake charm, pale blue pearls and pink gems - MeiFlower
~~~~~~~~~~~~~~~~~~~


Papers and sentiment - Echo Park Digital- Spring Time collection
Circle card cut with Spellbinders die
Glossy accents on sunglasses
Metallic cord, ribbon, bird and butterfly beads - MeiFlower
~~~~~~~~~~~~~~~~~~~

Papers - Clipart Fairy - Cool Dude U Rock Creative set
Graffiti font - Graffiti Treat - Dafont (I've coloured it in)
Grosgrain ribbon - MeiFlower
Button - Stash

The photos have turned out rubbish, the light wasn't brilliant and I had to use my daylight lamp, so they all look a bit washed out and have lost some detail, the stopper in the pic above is probably the closest to the proper colours.
~~~~~~~~~~~~~~~~~~~
This final card was made for my friend, who's mum passed away on Christmas day.
I requested the image specially from Gayle, and she asked me if I would mind if she put it in the shop, which of course I didn't, so although the card has been made for a while I was holding onto it until the image was released.


Black, white and silver card stock
Black organza ribbon - MeiFlower
Silver card candy - stash
~~~~~~~~~~~~~~~~~~~

That's it from me for today - have I made up for my lack of posting over the last week?
I will be back tomorrow with some Teddy Bo,
see you then.
Colette xx

Sunday 5 February 2012

A bit of this and a bit of that

I was going to start off with a comment about how cold it's been over the last few days, but I have just read a message from one of my Teddy Bo team-mates who lives in Norway and the temperature there is -31 degrees, it's practically tropical here compared to that LOL!

I have a few Clipart Fairy cards to show you today. It was originally going to be three, but then somebody asked me for a quick thank you card so I've ended up with four.
I must apologise for the terrible pics, but the weather has been so dark and dismal here that I had to use my daylight bulb and the photos aren't very good.

Card 1
 I put this card together from various parts of the Creative Easel Top Tick Tock 3 interactive kit.
In my graphics program I layered the stopper section onto the easel front (I wanted an A5 size card) and added the wording, I printed it out, along with two of the stopper sections. I added a tab at one side of each stopper section and folded them in half to make my doors.

I printed papers from the kit, onto card for my butterfly and pearl paper for my roses.
Butterfly Die- Marianne Craftables
Roses  and foliage dies - Marianne Creatables
Pearls and Brad - MeiFlower

~~~~~~~~~~~
Card 2
 For this card I used the shape of the previous card as a template, and also used the clock numbers and fingers, which come separately with the above kit. The papers are from the Nature Boy papers, and the bunting comes from the Crazy birthday square frame kit. I bought the image from Sassy Cheryl's Illustrations,  Wendy uses a lot of her illustrations but they are incorporated into the kit designs and don't come as a separate image, but the papers match the illustrations perfectly so it is worth investing in them, to make your kits go further.
Image - Crazy Father - Sassy Cheryl
Grosgrain ribbon - MeiFlower

~~~~~~~~~~~
 Card 3

Oval die - Marianne Craftables
Plain circle Die - spellbinders
Fancy circle die -  Nellie Snellen Multi Frame
Charms, gems and metallic cord - MeiFlower

~~~~~~~~~~~
Card 4
My final card uses papers and flowers from the Big Blooms button it kit. The scalloped design I made myself.
Martha Stewart border punch - Half daisy
Template for making gem swirl - Bazzill Jewel templates
Ribbon, gems and pearl ribbon slider - MeiFlower

Well that's if for today folks. See you Tuesday with Teddy Bo.

Friday 3 February 2012

A Steampunk Valentine

I thought I would show you my very first attempt at Steampunk today. I posted it on the Teddy Bo Challenge Blog last friday, but couldn't show it on my blog because it was Polkadoodles day, it's the other teams turn on the PD blog this week so I thought that this was the perfect time to show this card.

Now I have probably told you this before but Gayle who draws Teddy Bo, also has a couple of other ranges of digi stamps, there are the D'Arcy stamps but she also does a range called Wonderland stamps, which are a little bit different from her others and the digi stamp I've used on this card is from that range. She is called the Queen of Hearts (from Alice in Wonderland) and she is just gorgeous.

 Image - WS_019_Queen of Hearts-Coloured in Photoshop
Geared Heart and Flowers - This be me scraps - Steam punk for her (on sale for $1.00 at the moment)
Cogs and gears from an old clock
Sentiment mat - Xcut nesting dies-ornate bookplate
My hubby took an old clock apart for the cogs.
The large heart with the clock in the middle is a graphic which is printed onto 190gsm Matt Photo paper, but it looks so realistic, I actually want to wind the clock up and put the time right. LOL!

I am going to enter my steampunk card in these challenges
Just Inspirational Challenges - Picture inspiration & optional sketch

Little Miss Muffet Challenges - Valentines & love
Moving Along With The Times  - At least 1 heart clearly visible

And then for a complete change of subject, I have a baby card to show you. I am not sure what the name of the fold is, but is is something like  aTri-fold, fold back card!?!?!?!?!?!
I really don't like to make cards any smaller than 15cms sq or A5 and all the templates I could find for this type of card ended up being DL size, so I used two pieces of card and adapted the design to make a card that measures just under 15cms sq.

This is how the card looks folded flat.
 Image - Babies Clipart Collection - Prints of Joy
Papers - Zoe's Spring - The Paper Shelter
Ribbon and dummy - MeiFlower
Lace and card candy - stash

Here it is open

and here it is wider, so that you can see a bit of the inside.

Hope you enjoyed today's cards, I'll be back Sunday with a Clipart Fairy creation.

Colette xx