Wednesday 31 August 2011

I beg your pardon, I never promised you a Rose Garden!

That title just sprang into my mind and now I can't stop singing the song!!! Anyway, the title sprang into my mind because Rose Garden is the name of a new set of papers and card sets from the Clipart Fairy, and today I have a card to show you made using the papers, a page and word art from the book-a-easel set and corners which come from the notebook set.


I printed the plain paper directly onto card, then flipped it over and printed one of the other papers on the inside, and cut out my card blank. I layered a patterned paper onto the front, added glitter to the corners and book page (which I used as a topper) then attached to the card using foam pads. I printed some of the papers onto pearl paper, printing both sides with a different pattern, then used my CREAlies die flowers no.5 to cut and make the flowers. The leaves are CREAlies shapes no.12, which once again I glittered before adding to the card. Pearls are from stash.


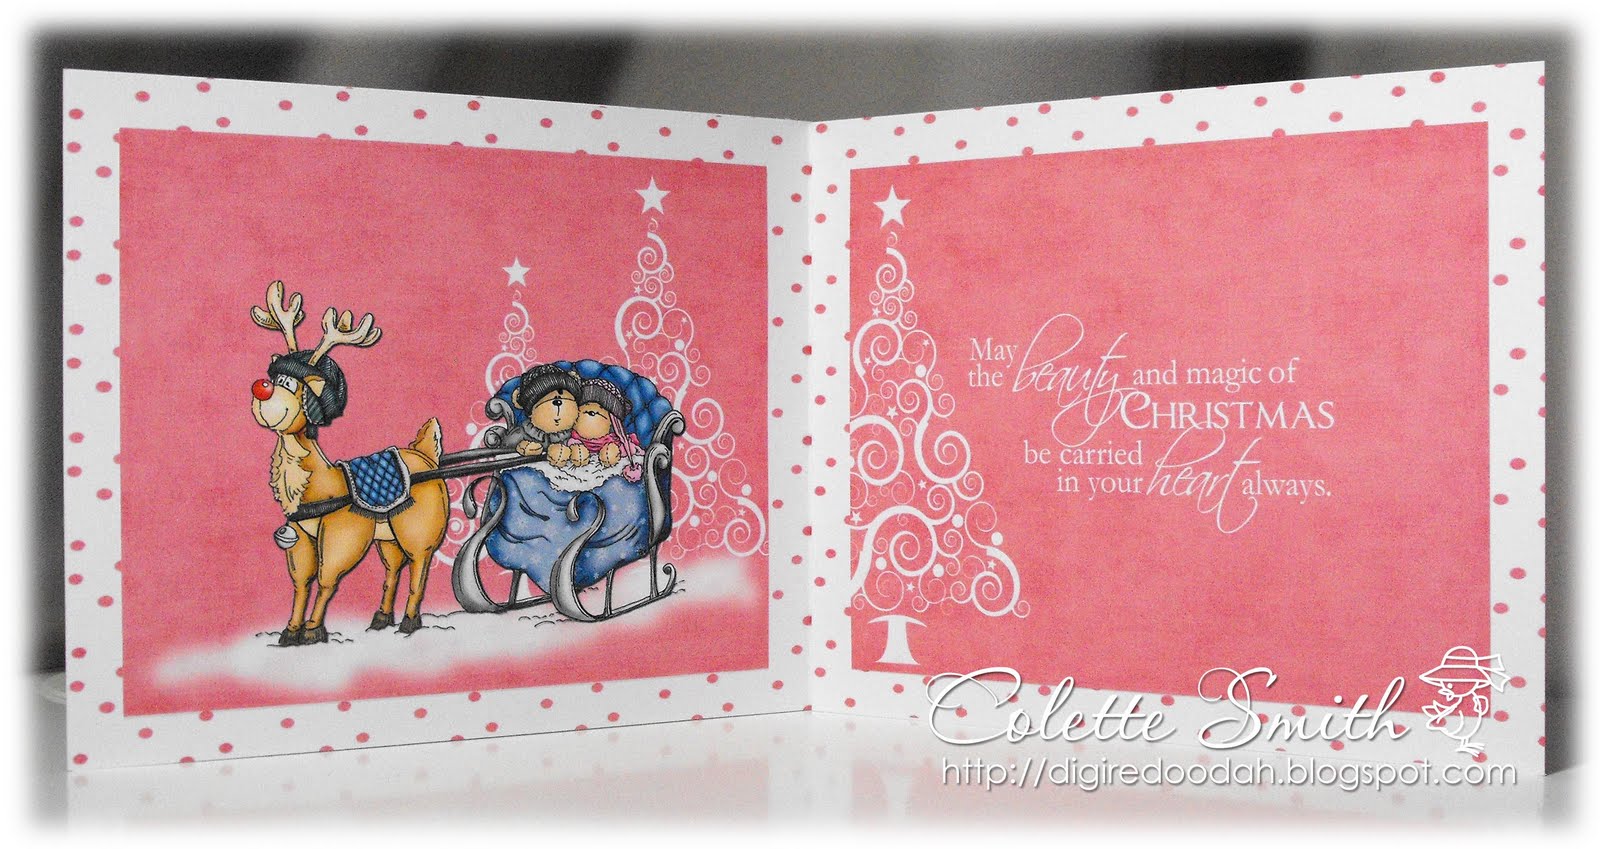
I printed more papers, corners and the book-a-easel page again, to decorate the inside.

There is a whole selection of printables using these papers here and the interactive versions can be found here

At the weekend I attended Wendy's (the fairy herself) August Workshop, we made 5 cards, a notebook and a box, quite a few of them using the new Rose Garden sets. I haven't quite finished my notebook yet and I forgot to photograph the box, but here is a quick peek a the rest of the things we made.


You'll find all the Ready to print kits for these in the printable store here, and some of them are available as interactive kits here.

I am entering my card into the following challenges.
Bearly Mine - Flowers Flowers Flowers
Creative Card Crew - Anything Goes
Going Grey With Scrap-Creations - Decorate the inside of your card
Partytime Tuesdays - #31 Anything Goes
Top Tip Tuesday - Shabby Chic
Make it Monday - always Anything Goes

Tuesday 30 August 2011

Happy Teddy Bo Tuesday

It's already Tuesday again, with the Bank Holiday this weekend here in England I have been totally getting my days mixed up, I thought Monday was Sunday, so now today is Monday, but it's really Tuesday!!!!
are you confused yet? LOL!

Here's my card for this week, it is not actually Team A's turn until next week, but after doing this every Tuesday for about 7 months now, I find it really difficult to miss one. Plus every week there are fabulous new graphics to play with, it's soooo hard to resist!


I have used one of this week's new graphics - which I have coloured in Photoshop. I have printed it out twice and layered it up using foam pads to give it a 3D look. The papers and sentiment are from a couple of Nitwit kits, The paper roses are made using a Marianne die, the leaves are a CREAlies die, and the scalloped border is a Nellie Snellen die. The ribbon is from stash, as are the pearls in the centres of the roses. There is also lots of glamour dust and glossy accents on the goggles.


I had almost finished colouring the stork when I heard from my friend Donna that her daughter Leah had just given birth to a new baby boy, he's called Oscar and weighed 8lb 6ozs, so I added his details to the little tag and this card is for him.

I don't think she'll mind me showing this gorgeous little pic of  Oscar.


isn't he yummy!!!

Here is a peek at the new graphics in store this week, head over there for a closer look.


... and don't forget to check out the challenge blog to see all the fantastic DT inspiration.


I am entering this card into the following challenges;

Forever Friends - must include animal - 3D
Make it Monday - always Anything Goes
Opus Gluei - Roses or Rosettes
Creations by Gill M - #14 Anything that flies
One Stop Craft - #146 Anything but square
Fuzzy Wuzzy -  include an animal - shaped card


Sunday 28 August 2011

Quirky Crafts Guest DT spot

A couple of weeks ago I was lucky enough to be chosen as the Quirky Crafts DT favourite, as well as a prize of some digi images I got the chance of a guest DT spot.
The challenge this time around is Flourishes and Embossing, and is being sponsored by Stitchy Bear Digital Stamps, we were given a choice of images to use and I just loved this one, it's from The Hat Silhouette Series and is called Feather Flourish.


The turquoise metallic embossed card and handmade glittered paper have been in my stash for a long time, I bought them at a local craft shop a couple of years ago, and they have been safely stored in one of those piles that everyone of us has called 'too gorgeous to be used' hehe!, but I finally took the plunge and cut into them (it broke my heart but it had to be done, sob, sob!  LOL!). I embossed the oval with a Cuttlebug embossing folder called Dawny, the flourishes and leaves are a Magnolia DooHickey called swirl and leaf, the black organza roses are from MeiFlower and gems, ribbons, feathers and pearls are from stash. I layered the hat silhouette onto the oval, using foam pads, but when I cut it out I left a white edge which I glittered with glamour dust, the leaves and parts of the hat are also glamour dusted. Not sure if I over-did the bling but I love the way it looks, its all sparkly and twinkly.

I used the same image to decorate the insert, also paper from The Clipart Fairy Sweet Candy paper pack and a flourish that comes from a set called Flourish Brushes by Michelle Coleman I have had them a long time and can't find a link to them any more.

What do you think, too much bling!....   can you ever have too much bling though? LOL!

Also look what is coming to WH Smith's, HobbyCraft and some local craft shops!


Due out on 1st September, (although I have it on good authority that some places already have it in), this is a kit and magazine, all boxed up together, from Practical Publishing. 
In it you'll find Polkadoodle papers, stamps, stickers, die-cuts, templates, buttons, ribbons and a whole magazine full of inspiring projects made using the kit, including some by little old moi! (that's my teepee card on the front woohoo!!!)

I'm going to enter my card into the following challenges

Scrappy Frogs - Bling
Stampin' Sisters in Christ - Choose at least 3 (Ribbon, Button, a Swirl, Hat Pin, Brad, Charm, Popped up Image) my 3 are Ribbon-swirl-popped up image
Poodles Parlour - anything goes
Show and Tell - Anything goes
Charisma Cardz – Glitter It
Scrapbook Sisters - #49 flower, ribbon, gem
Bearly Mine-Bring On The Bling

Saturday 27 August 2011

Joy in Colour

A couple of days ago I showed you my black, white and one other colour card for the Teddy Bo challenge using  the JOY digi image. Well today I thought I would show you another one I have made with the fully coloured version of the stamp.
I love these word stamps because if you print them big enough you practically have a card made, you only need a few little finishing touches to dilly it up.

I printed the image out with black rectangle around it, cut around the inside of the wreath and then layered the whole thing onto a white A5 card blank with foam pads, I printed a second version and layered up the letters, the wreath and Bo's face, including the fur of the hood. I left a small white edge around the letters when I cut them out which I glittered  before attaching to the card, I also added some glitter to the fur around his face and stickles for the berries on the wreath. Some sparkly peel off lines and a red organza ribbon finished it all off.

I have tried to show the layering on this photo.

and here's the inside.

I'm out at a Clipart Fairy workshop all day today, so hopefully tomorrow I'll have some more goodies to show you.

I am entering this card into following challenges

Inspire Me Fridays - always anything goes

Friday 26 August 2011

Spots and Dots

This week's challenge over on the Polkadoodles blog is
 Spots and Dots
we want you to show us your spottiest, dottiest creations, and for us DT girlies it's also stash box stamp week, a chance for us to show you how we've used Polkadoodle products with our favourite stamps.

Any regular followers of my blog will know by now that I am not really into rubber stamping, I own about three, can't use them for toffee and prefer to do everything digitally, so whenever stash box stamp week comes around one of my friends usually stamps an image for me to colour in. This cutie was given to me a while ago and I have no idea what company she comes from, so if you know give me a holler and I will add it to the blog.


The blue dotty paper and banners come from All around and everywhere, the big spotty paper comes from Candy Doodles. I coloured the image with Promarkers, cut around her with an X-cut scalloped rectangle die, added a piece of scrap PD card to the top and turned her into a tag. The dotty paper is raised on foam pads and the tags are tucked down behind it. I cut out the banner and draped it around the curves on a piece of bakers twine (Wild Orchid Crafts). The flowers and ribbon are from my stash box.

Head over to the blog and check out the scrummy inspiration from the rest of the design team.
You have until Sunday 4th September noon (GMT) to get your entries in, we look forward to seeing them.


I am entering this card into the following challenges

Delightful Challenges -Must Use Digital Paper
Digi Doodle Shop's Best - Anything Goes
Pixie Dust Studio - Add a Tag or Create a Tag
C.R.A.F.T.  - Colour Fiesta' Inspiration Pic 
Flutterby Wednesdays - must include butterfly, fairy or angel - #168 open


Tuesday 23 August 2011

Black, White and one other Colour

It's Team B's challenge over on the Teddy Bo challenge blog for the next fortnight, and the theme is
Black, White and one other Colour
The design team have interpreted it in a number of different ways, so pop over to the challenge blog and check them out. Although it's not technically our challenge, I do like to have a card to show on a Tuesday, so keeping with the theme here's what I have come up with.


I've used one of this week's new releases Bo in the Christmas wreath, which is a three part pack, you get Bo in the Wreath on his own, and both Joy and Noel too each with Bo in the Wreath representing the O. The image has been coloured in Photoshop in full colour, then I have desaturated all but the red. I printed the image out twice and popped the letters and the wreath up on foam pads. The paper is from Debbi Moore's Black and White Chic Boutique CD, the red metallic card is from Home Bargains, black organza ribbon from MeiFlower and white ribbon with rose from a local craft shop. I have paper pieced the J and Y, covered the red bow and ribbon with glossy accents and added nail gems as the berries.

 Expect to see this image again this week only in full colour next time.

Here is a peek at the rest of this week's new releases, pop over to the store for a better look.


You have until Sunday Midnight (GMT) 4th September (oh my goodness it will soon be Christmas) to enter the challenge, can't wait to see your fabulous creations.

This is three posts in three days from me, so I promise I will leave you in peace for a day or two now.

I would like to enter my card into the following challenges

Make it Monday - always Anything Goes
Digi's With Attitude!- anything goes
Paper Crafting Journey - 2W - Anything Goes 
Southern Girls - B&W  With a POP of ONE colour 
Try It On Tuesday - Anything Goes

Monday 22 August 2011

New Shaped Book-a-Easel

Yesterday I posted a link to The Clipart Fairy's new shaped Book-a-Easel freebie, but afterwards I thought to myself if you don't know Wendy's stuff then you may not know what a Book-a-Easel looks like. I thought I would make one up today with the freebie, so that you can see how fabulous they are.


I used the freebie, the blue snowman from Colour Frosty Longstockings, plain blue paper printed directly onto card from Ice Queen papers, and one of the Winter Words papers which I bought last year but can't find on her site now, although I did find Snowflakes and Beyond papers which would be perfect too. I made the word-art myself  and the snowflakes are made with Marianne Creatable dies and a Martha Stewart punch. Ribbon and gems are from stash.

To make the Book-a-Easel - I re-sized the 2 pages, making the front one smaller than the back one, I added my graphic and word-art onto the front page and the book-plate and then printed it all out onto one sheet of A4 card. I printed a sheet of blue card for the easel base and also the winter words paper and an extra snowman.
Make up your easel base as usual, mine is 14.5 x 14.5cms, cut a 1cm strip from the front fold-back section, (when you add your back page the card doesn't show below the shape). Cut out pages, book-plate and extra snowman leaving a small white edge around each piece. Score the front page down the middle and then curve either side from the centre. Glamour dust all the white edges and any other parts that take your fancy. Add ribbon down the centre of the front page and a bow at the top. Attach the back page to the easel base, then the front page to the back by using wet glue down the centre crease. Fix the extra snowman into place using foam pads. Curve the book-plate in the same way as the front page, put three layers of foam pads under it, a bit of wet glue at each side and stick into place. Glitter and make up snowflakes, and affix where desired. 
(To glitter my snowflakes I added a drop of water to a small amount of tacky glue, brushed it over the snowflakes and then covered in glamour dust, you get really good coverage with the glitter this way.)

That's all there is to it, not too difficult but they look really effective. There are lots more Book-a-Easels in the Clipart Fairy store, ready to print here or interactive here for the regular ones and here for the new shape.

Thought I would enter my card into the following challenges

Christmas Card Challenges - must be Christmas - Glitter
Sketchy Colors - Colour Inspirations* Shades of Blue
Paper Playtime - 2W - (2nd week) Anything Goes
Bah Humbug - must be Christmas - something new (freebie)
Totally Papercrafts - Christmas in August
Aud Sentiments Challenge - "Merry Christmas" on your card somewhere
Shelly's Images -Show Us what you got (anything goes)
Make it Monday - Always anything goes
Scrapbook Sisters - #48 Blue

Sunday 21 August 2011

It should be illegal to look this good!

Ha ha! not me I'm afraid, in my case at the moment it should be illegal to look this bad!!!, must sort out my hair, my body, my skin, my clothes LOL! The last couple of weeks have been so hectic, that I've been meeting myself coming back, but I think I am now finally on top of things and can get back on track, I hope I haven't spoken too soon!

I wanted to show you this card I have just made using The Clipart Fairy's Pru Longstockings kit, you get the girl graphic and 13 co-ordinating 12x12 jpeg papers all for only £1.50, now is that a bargain or what!

All the papers are from the kit, even the plain lilac and green, which I printed straight onto card. I have a bit of a thing for flowery papers at the moment so am loving that one.
I used a Marianne Creatable die for the large circle, which is also embossed, and a Nellie Snellen die for the smaller circle. I printed out a piece of lilac card with the sentiment on it, glued both die shapes onto the card and then cut around the edge leaving a little bit of lilac showing. The sentiment is a freebie from Create with TLC, I just changed the colours to suit my design. The borders down the sides are a Martha Stewart punch, the ribbon, flowers and gems are from stash. There is lots of glamour dust on the front section, I picked out the green lines in the plaid design with it, but it isn't showing up too well in the photo, the purple glitter is from Debbi Moore.

I added a message panel on the back centre section.

I printed Pru out a number of times and decoupaged her to give her some dimension.

This is the first card I have made in this shape and I am really pleased with the way it turned out, although I can see a few things that need improving, so expect to see a few more of these!

There is also a fab freebie on The Clipart Fairy blog, it's one of her new shape Book-a-Easels, in a lovely blue, snowflakey design, perfect for your Christmas cards, so head over there, snag it and give her a big thank you.
*** Edited to add*** You can find my card made using the freebie HERE

I am entering this card into the following challenges;

Crazy 4 Challenges - #C4C101 Bingo (embossing, die cuts, ribbon)
Designed 2 Delight  - Anything Goes
Ellephantastic  - August: Add some layers -Till 2nd Sept
Crafty Ann's - scallops and or fancy borders
Fussy and Fancy - use three or more of your favorite embellishments (gems)
Inspire Me Fridays - always anything goes
Jellypark Challenges - favourite embellishments (gems)
Poodles Parlour - anything goes
Mami Doodles - shaped card

Friday 19 August 2011

Polkadoodles Single Layer Challenge

The title says it all really, this week the challenge at Polkadoodles is to make a single layer card, by either printing  or stamping directly onto the card, and only using minimal embellishments.

This took me back to my days of digital scrapbooking, where you would make the page look dimensional by adding shadows to the layers, which is exactly what I decided to do.


I used the Sugar Birdies Collectors Edition CD rom and a couple of gems from stash for the flower centres. I made my design up in Photoshop and then printed directly onto linen card, I put the card through the printer a second time and printed the insert straight onto the card too.


Pop over to the Polkadoodles challenge blog and check out what my teamies have come up with for their single layer cards and don't forget you have until Sunday 28th August, noon (GMT) to show us your fabulous creations.

Tuesday 16 August 2011

Teddy Bo Tuesday

Hello and welcome to another Teddy Bo Tuesday, we are half way through our Love is in the Air challenge, so you still have until Sunday 21st August to get your entries in.

I just had to use the Sledging cuddles image as Bo and Bea looked so cosy all snuggled up, and the reindeer is just too cute.

My image was coloured in Photoshop. I also made the background in Photoshop, the trees are a freebie brush I picked up in blog land a long time ago, I don't remember where it came from. The picture is mounted onto a piece of silver card, the corners have been made with a photo corner punch. The papers are from The Clipart Fairy, the one on the front is from the Hot Pink Bauble set, and the others are from Hot Pink Chalky Papers. Ribbon and lace are from stash and the jingle bells are from The Ribbon Girl.


There are some gorgeous new images in store so head over and check them out.


Don't forget to pop over to the challenge blog and check out the fabulous DT creations using
this week's images.

Before you go, I thought you may like to have a little nosy at a couple of photo's from my daughter Stacy's friends wedding at the weekend. Stace was chief bridesmaid, her partner Neill was best man and my grandson Will was a page boy. My new grandson, who is not due for another 10 weeks, was also chief bridesmaid LOL!


Oh by the way my new craft room is getting there, it's not quite finished yet, as I still have lots of stuff to sort, but I have done enough to enable me to use it for my cards this week, I will have to try and finish it off bit by bit, whenever I get some spare time.

See you Friday,
Colette xx

I will entering my card into the following challenges

Christmas Card Challenges -  must be Christmas - Christmas Cheer
Secret Crafter - #147 Christmas is coming
Make it Monday - always Anything Goes
Paper Playtime - Anything Goes

Friday 12 August 2011

Polkadoodles Good Luck Challenge

This week's challenge on at Polkadoodles is Good Luck. Show us your cards or projects sending Good Luck wishes.

 I decided to make a rocker card, as I haven't done one for a while and it's one of my favourite types of card to make. The good luck letters come from the Magical Winter CD1, papers and image are from A Double Sprinkle of Kraft. I used Go Kreate scalloped circle dies to cut out the image and background frame, the charm is from a Pound land necklace and the glitter is Debbi Moore.


The letters and image are attached with foam pads to give a bit of dimension to the card, the inside is finished off with a matching insert.

I'm looking forward to a fun filled evening tonight as I'm going out with my hubby, his sister and her hubby to see Jason Manford, I'll need a bit of light relief after working all week on trying to sort out and move my craft stuff from one room to another.
Off to a wedding tomorrow, Eric is taking the photos, so we will be there from very early morning until last thing, it will be a long day. Stacy is chief bridesmaid, Neill her partner is best man and Will is one of the page boys, will hopefully have some pics to show next week.

Don't forget to pop over to the Polkadoodles challenge blog and check out all the fabulous inspiration from my fellow teamies. You have until Sunday August 21st, midday (GMT) to enter our Good Luck challenge.

I would like to enter my card into the following challenges.

Crafty Sentiments - Punches and Die Cuts
Delightful Challenges -Things with wings
Bearly Mine - Charms and spots/dots
Make My Monday - Birds or Bugs

Tuesday 9 August 2011

Teddy Bo Tuesday, Sale and Challenge

Hi, it's another Teddy Bo Tuesday and what a lot we have going on today. Not only is it the start of our new challenge, but Teddy Bea has decided to have a Summer Sale too, so now's your chance to stock up on your Teddy Bo and Co images.

Teddy Bea wants to invite you to her Summer SALE.....
Monday 8th - Sunday 21st August.
Buy 3 get one FREE (of the same value)...
AND when you spend £10+ get even more FREE!!!! 

When ordering please put your choice of free graphic on your Paypal order form.


This week's challenge is hosted by my team and is Love is in the Air we are looking forward to seeing all your fabulous lovey, dovey creations.
We only have one little rule and that is You must use a Teddy Bo and Co image on your project.
The overall winner will receive their choice of ten Teddy Bo and Co images, the runners up get one each.


I made a Christmas card suitable for that special person in your life. I used the Deacon Blue interactive card on a stand kit from the Clipart Fairy for my card base and one of this weeks new releases Teddy Bea_129, coloured in Photoshop. The sentiment, which starts on the front and carries on to the insert reads
A million snowflakes would be too few...
...to carry all my love for you!


Check out this week's fa-BO-lush new releases


This is a scheduled post, so as you read this I am probably sitting on the bedroom floor surrounded by card, paper, ribbons, flowers etc., trying to sort it all out, tidy it up and move it into my new craft room, I would much rather be crafting, but I need to be able to find stuff, which is a bit of a mission impossible at the moment, so it needs to be done.

You have until Sunday 28th August, midnight (GMT) to get your entries in to the challenge and with such a fantastic prize on offer, why not give it a go.

I am entering this card into these challenges;
KB Cute Monday - Anything Goes using a Digi
Ooh La La Creations - Christmas Card
Card Cupids - Buttons and/or Ribbon
One Stitch At A Time -  Use a Digi
Fussy and Fancy  - Christmas in July
Crafty Sentiments - Christmas
Moving Along With The Times – Don't be square
Paper Play –Christmas In August

Monday 8 August 2011

Forever Friends Guest Designer

A couple of weeks ago my Teddy Bea ice skating Teepee card was chosen as the Forever Friends Favourite, which means I had the opportunity to be a guest designer.
This weeks challenge is being sponsored by Di's Digi Downloads, and I was given the ever so cute Baptism bows digi stamp to work with. The theme for the challenge is a round card and it must contain an animal/bear.

Here's the card I made using the image.


I coloured the digi in Photoshop, printed in out a few times and layered it up to give a slight raised effect. The spotty paper is from the Nitwits - Hey Cupcake kit. I used Go kreate scalloped circle dies to make the frame and then embossed it with the Crafts Too - dots folder. I rubbed a pink ink pad around the edges of the frame. I ruffled (drew a circle of tacky glue then just pushed and scrunched the ribbon onto it) some vintage seam binding from the Ribbon girl around the image before adding the frame. I glamour dusted the edges of the card and added a flat back pearl to each scallop. The little butterfly embellishment came from my friend Donna. I punched two holes in the side of the card and threaded some pink seam binding and chiffon ribbon through and tied in a bow.


Pop over to the Forever Friends challenge blog and see what fabulous creations the Design Team came up with.

Back tomorrow with Teddy Bo.

Catch The Bug - August Anything goes Challenge
Crazy 4 Challenges - Create a shaped card (not Square or Rectangle)
Ellephantastic - August: Add some layers Till 2nd Sept
Make it Monday - Anything goes
Inspire Me Fridays - always anything goes

Friday 5 August 2011

Teddy Bo Fairytale Friday

It's that time of the week again, time for another story about the goings on at Teddy Bo towers, pop over to the challenge blog and check out this weeks tale, there's also a bit of eye candy so go take a look, go on, you know you want to LOL!


Here is the card I did for the post, I used this sketch from Fetch a Sketch
rotated it 90 degrees and decorated it with lots of beads.


The pretty ribbon was bought for me by my friend Karen as she knows they are my favourite colours and I based my colour scheme around it. I used the  "your wish will come true" digi stamp, coloured in Photoshop, I also made the background paper in Photoshop as I just wanted a gentle smattering of colour and had nothing in my collection which was suitable. The beads are all from stash, the little star charm came from a necklace bought in Poundland for, yes you guessed it LOL! a pound, I bought a load of them a couple of months back as they have about 10 charms on each one. The sentiment was a freebie from Blue Bird Flats.


I've got a busy weekend coming up, finishing off my DT work for next week as I am not going to be able to do any crafting for a few days, we are in the process of moving my craft stuff from one room to another and at the moment it is in boxes and containers all over the bedroom floor. Hubby is building me a shelving unit and then it will take a couple of days to sort through it, and move it over to the other room.
I have scheduled my posts for next week so there will still be stuff to look at, on Monday I am guest designer at Forever Friends, then there is Teddy Bo Tuesday and Polkadoodles Friday. Hopefully the week after that I will be all sorted and back to normal.


I am entering this card into the following challenges,
Fetch a Sketch  - Sketch
Charisma Cardz – Bingo - circles, ribbon, charms
Craft Us Crazy - Anything goes in August
For Fun Challenges - anything goes
Bling It On - A.....B.....C........ Animal, Beads, Charm


Polkadoodles Case It challenge

This week's Polkadoodles challenge has been set by Lou and she wants you to use a previous DT card or project as your inspiration, and "CASE IT"


 I decided to use a card by Ruth, I love her clean style, it's something that I just don't seem to be able to get to grips with.
 Here is Ruth's Card


and here's my version


I love the Kraft card but don't have any so I decided to use brown parcel paper, which I buy rolls of at my local Poundland, I cut the scalloped square with a Go Kreate die, attached it to a square (with rounded corners) of blue card, added faux stitching, wrapped string around, threading it through a hole in the sentiment circle as I went, and attached the whole thing to the front of a blue card. The country cottage image and sentiment panel are from Paper Boutique Vol III. I used a nestie to cut the shape around the cottage, layered it onto more parcel paper and trimmed around leaving a small edge, this was then layered onto blue card and attached to the card front with foam pads. I also printed a second cottage to layer up over the first. I made the rose with Tim Holtz's Tattered Florals die.
Not sure if I managed the clean look but I'm pleased with the way it turned out.


I made a matching insert and thought I'd show you a close up of my rose, not bad for a first attempt I didn't think.

Hop over to the Polkadoodles blog and see what inspired the other girls and hopefully find something to inspire you to join in too.

I am entering this card into the following challenges.


Cute Card Thursday - No Designer Paper
Delightful Challenges - Stitching real or faux
City Crafter Challenge - House