Pages

Thursday, 31 May 2012

D'Arcy's Diaries New images and challenge

It's the start of another challenge over on the D'Arcy's Diaries blog today and this time around it's a.....
Menu challenge
Pick a dish from each course and then any two sides and use these to make your card.

Here is the Menu
~~o0o~~

Starter - Lilac and Turquoise, Pink and Green, Navy blue and Red
Main - Birthday, Thank You, Anniversary
Dessert - Ribbon - Lace - String
Pick two side dishes from - Gems, Pearls, Swirls, Charms, Glitter, buttons, tag, flowers,
Stitching (real or faux), butterflies.
~~o0o~~

I wanted to make my card look like a Centre Stepper card, but not actually have to fiddle with all the measuring and folding, so with a few pieces of card and a concertina here is the end result.
What do you think?!

 My menu choices were
Starter - Lilac and Turquoise
Main - Birthday
Dessert - Ribbon
Two sides - Butterflies and Pearls

Image - DD_051-B - Coloured in Photoshop
Papers - Nitwit Collections - Promises Collection
Sentiment - Freebie- Create with TLC
Dies- Marianne Designs Double Frame LR0141
Memory Box - Vivienne Butterfly
Magnolia Doo Hickeys - Swirly Butterfly
Martha Stewart Border punch
Ribbon and Pearls - Meiflower

I'm going to enter my card into the following challenges
Dies to die for - Anything Goes with a Die Cut (must be a die sold in store)
Southern Girls -  Die-cut or punch


Pop over to the D'Arcy's Diaries challenge blog and have a look at the fabulous creations from the rest of my teamies and don't forget to check out this weeks new releases.


Thanks for stopping by
Colette xx


.

Tuesday, 29 May 2012

Teddy Bo Tuesday New Challenge

It's the start of a new challenge over on the Teddy Bo Challenge Blog today and my team, Team A are hosting.
Here in the UK we will be celebrating the Queen's Diamond Jubilee over the weekend, so we thought it would be appropriate for the theme of our challenge to fit in around the celebrations, with that in mind our challenge this week is

Red, White, Blue and lots of Bling!

So let's see what you can come up with using those colours on your project and adding lots of pearls, gems, glitter, etc.

I have made an easel card this week, using one of today's new releases.

Image - TB_207 - Coloured in Photoshop
All papers and circle - Little Sir Nitwit - Nitwit collections
Crown - Sizzix Sizzlets Tiara #2
Elegant Scroll - memory Box
Scalloped rolled flowers - Memory Box
Martha Stewart Border punch - Garden Trellis
Ribbon, pearls, gems and charm - Meiflower


I am entering my card into the following challenges

Cupcake Craft - Royalty
Make it Monday - always Anything Goes
One Stitch At A Time - Colour Combo: Red, Blue and White
Stampalot Challenge - Medals and Monarchs
The Crafty Pad -Colours of your Flag and/or Sketch*
Craft Your Days Away - Red White and Blue
Glitter Geeks – Diamond Jubilee


This week's New Releases


Make sure you pop over to the Challenge blog and check out the fabulous creations from my teamies.

Hugs,
Colette xx


Sunday, 27 May 2012

Clipart Fairy Hat Trick

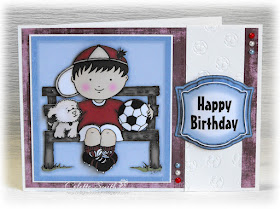
Today I have three cards to show you all made from the On The Bench Mega Kit. This is a fabulous kit that not only contains five papers, but also two different shaped toppers, the graphic and decoupage layers, so there is lots of versatility.

My first card is an A5 landscape, pretty straightforward and quick to make. I layered the image, but instead of using the decoupage in the kit I did it my own way, using quite a few layers.

I added wording to one of the topper sets and embossed the white panel with a Crafts-Too Footballs embossing folder, the pearls are from Meiflower.

My second card is an Easel card. I wanted to make the image the  main focus on this one, so I re-sized it, so that it would fill the square base card.
Once again the image is decoupaged but there's not quite as many layers on this one. The white panel has been embossed with the Footballs folder, I'm not sure where the large football graphic came from, it's been on my hard drive forever and the ribbon is from Meiflower.

My final card was a bit of an experiment, one of my Teddy Bo Teamies has made a pocket card for this coming Tuesdays post, and I really liked it, so thought I would have a go myself. I knew how to make the pocket, but wasn't sure how to make it stand up. I was sitting at the computer thinking about this when I spotted my grandson's school picture on the shelf next to me, it's not in a frame, just in the mount that came with it, and I realised immediately that it was basically a pocket card. I turned it over and used the back of the mount as a template for my card.


Once again I used the Footballs embossing folder and ribbon and pearls from Meiflower


Here's the card with the tag and the back of the card, it stands brilliantly!

Thanks for stopping by
Colette xx

Friday, 25 May 2012

Going dotty!

This week has been one of those weeks, in fact so far May has been one of those month's, I've had lots of plans for things I wanted to get done and so far only managed a couple of them, something is always unexpectedly cropping up, it's been so bad this week I didn't even manage to get a Teddy Bo Tuesday post done, luckily it's not my teams turn to host the challenge, so it wasn't too much of a problem and today I have finally managed to post the card that should have been here on Tuesday.

Some of you may know that Teddy Bo's creator Gayle Cook also does another range of digi images under the name of Fairy Doodler, (to be truthful, FairyD has been around quite a bit longer than Teddy Bo) and this week we had a new release of FairyD images, including the fabulous Glamour-Puss girls.

I just love them and here is my card using one of these glamorous young ladies.

Image - FariyD_Glamour Puss 003 Coloured in Photoshop
Papers - Black polka dot - Shery K - Love in Paris
Red Polka dot - Shery K - Red
Sentiment - computer generated
Scalloped circle dies - Spellbinders and Go Kreate
Polka dot ribbon, pearls and charm - Meiflower

I will be entering this card into the following challenges

Aud Sentiments Challenge - Any sentiment
Digi Doodle Shop's Best - Let's go spotty
Going Grey With Scrap-Creations -  Bingo - I used Ribbon, Die Cuts, Pearls
Make it Monday - always Anything Goes


Check out the 'girls' and the rest of the new releases here

don't forget to pop over to the Teddy Bo Blog and have a look at the
fabulous creations from the DT.

Also over at Meiflower, grab your Jubilee ribbons at half price, very handy if you want to play along with the new Teddy Bo challenge coming up on Tuesday.

Queens Jubilee Ribbon

See you over the weekend with some Clipart Fairy.

hugs,
Colette xx

Thursday, 24 May 2012

D'Arcy's Diaries Mid challenge reminder

We are halfway through our Pennants/Bunting Challenge at D'Arcy's Diaries so there is still plenty of time to get your entry in if you'd like to play along. 

Last week I used the Girl Grad, so this time around it's the Boy Grad - no sexual equality issues here LOL!


Image - DD_049 - Coloured in Photoshop
Bunting Paper - Echo Park - Playground Papers
Cap and scroll Clipart - Freebie - Sweet Clipart (I changed the colour)
Sentiment - Computer Generated
Grosgrain ribbon - Meiflower

Pop over to the D'Arcy's Diaries blog and check out the fabulous inspiration from the rest of my teamies.

Here's my little graduate, my Grandson Charlie, him and his mum have been going to Baby Sensory classes, the  last one was today and all the babies had their graduation pics taken.

He also had a big day last Sunday when he was Christened, here he is with his mum and dad


do you think he has his dad's ears LOL!

Hugs,
Colette xx

Monday, 21 May 2012

Clipart Fairy Workshop

This month at the workshop, we made six cards, there is quite a bit of die-cutting and some embossing on the cards we made this time around.

 The only card with no die-cutting, this was made using papers, image and shapers from the

 ~~~oo0oo~~~

The next two cards were made as a pair, we die cut the wording with a Nellie Snellen Multi frames oval 7 die and using foam pads then added it to a square card blank,which had been matted with an embossed piece of card. We die cut two swirls with the Cheery Lynn Fanciful Flourish die, and added one and a half to the above card, along with a couple of roses.


After cutting the oval, we embossed the part left behind with a mask,cut it to the size needed, leaving extra at the top to make a flap, laid the embossed section over the wording and lined it all up, folded the flap and stuck the embossed section to the wording. We then added the whole thing to the card front using double sided tape. It was then decorated with the other half of the swirl, a rose, a metal corner and silver ribbon.


 ~~~oo0oo~~~

More die-cutting on this card, this time around using the Marianne Creatables ribbon border 3 die, which was cut from the piece of card with the bear printed on it, and then lined back up and stuck back together with a piece of tape across the back. Again we left space for a flap at the top and added the image section and the plaid background to the front of the card blank. The card was finished off by threading ribbon through the border die, pearls to the design and glitter on the flower.

  ~~~oo0oo~~~

This is an easel card made with the Make me a Topper V3 & Beyond Kit - Seesaw Pink and using the Memory Box scalloped posy die to make rolled roses to decorate, we used the left over bits from the rose die cuts as swirls.

 ~~~oo0oo~~~

The final card starts off as a tent card, with a piece cut from the bottom of the front, a strip of card is folded as a gate-fold and then added to the back of the card,

 only the bottom and the edges are stuck into place to form a pocket at the back which holds a tag.
The whole thing is decorated with papers from Curly's Butterfly Kit a scalloped circle is die cut using Spellbinders Lacy Circles die, from one of the co-ordinating papers and the image is die cut with a circle die and mounted to the scalloped circle with foam pads, before being attached to the card front, once again using foam pads.

As you can see another very busy workshop, 

Hugs,
Colette xx


Thursday, 17 May 2012

D'Arcy's Diaries New Challenge

It's time for a new Challenge over on the D'Arcy's Diaries blog and along with a new challenge comes some new releases.

This time around the challenge is......
Pennants/Bunting
we would like to see you use bunting on your card or project, or the bunting could be your actual project, it's entirely up to you. You have until Tuesday 29th May Midnight (GMT) for you entries to reach us and the winner gets to choose five fabulous D'arcy Digi's.

Here's my DT card for the challenge using one of the new releases

Image - DD_048 - coloured in Photoshop
Graduation shaper kit - Clipart Fairy
Sentiment - computer generated
Bunting - computer generated
Metallic cord and pearls - Meiflower

This weeks New Releases


Pop over to the challenge blog and check out the inspiration from the rest of my fabulous teamies.

I thought I would show you the fabulous birthday present I got from my Grandson's, my daughter has a friend who makes personalised bags, she paints a picture on the front of the bag of a big eyed girl and matches the eye and hair colour to the recipient, adding their name and something to do with their interests (mine has a pile of books as I love to read).


Isn't it brilliant, I just wish I was that slim and that my eyelashes were that long (short and blonde unfortunately) LOL!
I think you can order them through Facebook, but she only takes orders on the first of the month as she usually fills her order book up for the whole month in just one day, (they are very popular!).

In my last post I mentioned that I was off to see a Westlife concert that evening with my friend -well I never got there - very sadly my friend's brother in law was rushed into hospital on Tuesday afternoon and passed away at 8pm that evening, he was 51 years old, the same age as Julie and I. He died of a Pulmonary Embolism. Julie and I will have been friends for 40 years this September, and I would like to take this opportunity to send heartfelt condolences to her and her family.

Life is fragile, make the most of every minute
hugs to you all,
Colette xx


Tuesday, 15 May 2012

Teddy Bo Tuesday and Design Team Call

Not only is it Teddy Bo Tuesday, but it's my birthday too, woohoo! going out for breakfast this morning and then off to see Westlife in concert at the Liverpool Echo Arena tonight, with a meal first.
Now I'm not a big Westlife groupie or anything, but my friend Julie is not allowed to book tickets for any shows without seeing if I want to go too, and as I love a good night out, I tend to go along with her wherever she goes.

Team B are hosting the new challenge over at the Teddy Bo challenge blog this week and it's a
Sketch challenge and DT call
Here is the sketch if you would like to play along.


We are also looking for three new members to join our DT, so if you think you would like to join a bunch of mad wonderful ladies then make sure you enter the challenge and put the letters DT next to your name. It's a fabulous and friendly team to be part of and if you love the bears then imagine having every new image that comes out, as it comes out.

Here's my card for this week using one of the new releases
Image TB_204 - Coloured in Photoshop
Patterned paper - Kay Miller Designs - Light of my life
Plate stand die 2 - Joy Crafts
Grand Circles - Spellbinders
Sentiment - Create with TLC freebie - Coloured in Photoshop to match the ladybird.
Ribbon, pearls, diamanté buckle - Meiflower 


Check out this weeks fabulous new releases

Don't forget to pop over to the challenge blog to see this weeks gorgeous creations from the design team, and you'll also find all the details about the DT call 

Have a lovely day,
hugs,
Colette xx

Monday, 14 May 2012

Champagne Time Bear

Just a quickie from me today, another card using one of the Clipart Fairy's new kits, no mice today though, this time it's a bear.


Image and papers - Double Up kit  Xtra Champagne Time - Clipart Fairy
Die cut corners and border - Lea'abilities Border and Corner Curve
Dark Gold card - Every crafts a pound
Oval scalloped die - Spellbinders

I decided not to make a double up card with the kit, but instead made an A5 portrait card instead. In my graphics program I re-sized the sheet containing the tent card to fill an A4 piece of paper before printing, cutting and folding to make a roughly A5 sized card base, re-sized the layers I wanted to use to fit the base, made the sentiment panel up with the wording included in the kit,  then printed cut and layered onto the card base using foam pads. I die-cut the corners and border and fixed into place, adding the sentiment panel over the border with a double layer of foam pads.

back tomorrow with Teddy Bo,
See you then,
Colette xx


Sunday, 13 May 2012

Diamond Jubilee Stamp Freebie

A few weeks ago I made a couple of Diamond Jubilee cards and on one I had made a stamp, well as it is only a couple of weeks until we celebrate the Jubilee I thought I would put the stamp on my blog as a freebie, and as a bonus I have also done a blue version.

Here is a reminder of the card I used it on

and here are the stamps, just click on the image then right click and save as


I would love to see what you do with them, so if you use them please leave me a comment with a link to your blog and I will pop over and take a look.

Colette xx

Overrun with Mice!

After yesterday's post with the mouse card, here are two more little mice come for a visit.

Papers - Mouse with Love - Clipart Fairy
DAD - Alpha Set Mouse with Love - Clipart Fairy
Topper - Make me a Topper - Mouse with Love - Clipart Fairy
Grosgrain ribbon and Pearls - Meiflower 


Papers - Curly the Mouse Kit - Clipart Fairy
Topper - Make me a Topper, Curly the Mouse - Clipart Fairy 
Punches - Martha Stewart
Very pale mint green organza ribbon, pale green pearls and blue sequin blossom - Meiflower

The topper kit contains an editable sheets of rectangular and arrow tags, so you can add your own wording. 

See you tomorrow,
hugs,
Colette xx

A Message from Mouse

The Clipart Fairy has some new kits featuring cute little mice, and I have been having a play with some of them.
I had to use this one first as it contains my favourite colours of blue and purple. I also received my new Joy Crafts Plate stand die a couple of days ago, and couldn't wait to use it so this is the card I came up with.

Mouse and papers - A Message from Mouse Kit - Clipart Fairy
Plate stand - Joy Crafts Die - cut from silver card
Grand Circle die - Spellbinders 
Scalloped Die- Marianne Creatables frame flowers circle LR0112
Blue circle Die - Marianne Creatables double frame and swirls LR0141
Flowers - X-Cut punches
Ribbon, purple stick on pearls, gems and sequin blossom - Meiflower

I used various dies to cut out all the different sections of the card, attached the scalloped layer to the circle with double sided tape and then after threading and wrapping ribbon around the centre section fixed it into place with foam pads.I cut around the mouse image leaving a white edge and then used the decoupage included in the kit to layer up the bouquet of flowers.
The flowers were punched out, shaped and layered, then I added a purple sequin blossom to the centre of each, and tiny orange gems to the centres of the larger flowers in the bouquet. I placed a purple pearl between each scallop and fixed a message panel to the reverse for adding a written greeting.

I'll be back over the next couple of days with a few more mice cards.

Thanks for stopping by,
Colette xx


Thursday, 10 May 2012

D'Arcy Challenge Midway reminder

We are halfway through our latest challenge over on the D'Arcy's Diaries blog, so I have another card to show you using one of last week's new releases.
The challenge is Buttons and Bows and you have until Tuesday 15th May Midnight (GMT) to get your entries to us.

Image - DD_041 - Coloured in Photoshop
Digital papers and frame - Your Song, Penny Springman - Sweet Shoppe Designs
Sentiment - computer generated
Ribbon, small button, cord and charm - Meiflower


Close up of my button, bow and the cute musical note charm.

Pop over to the D'Arcy's Diaries blog and check out all the fabulous creations from my teamies.

hugs,

Colette xx

Tuesday, 8 May 2012

Button Up!

We are halfway through our Button Up challenge over at Teddy Bo, so today I have another card to show you using one of last weeks new releases.


Image - TB_203 - Coloured in Photoshop
Digital Papers - Country Drive - Echo Park
Frame - X-cut Ornate Frame Lge
Ticket - Marianne Craftables - Tags and ticket
Embossing Folder - Crafts Too - Daises (sanded)
Ribbon, button, Pearls - Meiflower

Pop over to the challenge blog and check out the rest of my teamies creations.

You still have until Sunday 13th May to enter our Button Up challenge and be in with the chance of winning 10 Teddy Bo digi-stamps.

Thanks for stopping by,
Hugs,
Colette xx

Monday, 7 May 2012

Two Baby Cards

A happy May Day to those of you in the UK, are any of you planning to dance around the Maypole today I wonder !

Once again I have two more Clipart Fairy cards to show you, this time around they are both baby cards.

I made a bit of a mess when printing out my first card, my hubby had used the printer just before me and left it on the wrong settings, I hadn't realised and went ahead and printed all the bits I needed for my card. When I took them off the printer I realised that they were the wrong colour, more of a peachy pink than the pinky pink they were supposed to be. I was going to re-print them, but I quite liked the colour and remembered that I had some new goodies from Meiflower and there was a gorgeous peachy pink organza ribbon and flowers amongst them so decided to use them anyway.

I folded a piece of A4 card in half to make an A5 tent card then divided the top section into two, one part being square the other a rectangle. I scored and folded the square diagonally to make a twisted easel section, and the rectangle in half to make a straightforward easel section. I then decorated the two sections up, die cut a stopper and added a punched border to the card base. The white scalloped circle is embossed but it doesn't show up too well in the photo.


Image and papers - Baby Bow - Clipart Fairy
Number One - Pink striped Alpha (retired) - Clipart Fairy 
Scalloped circle dies - Go Kreate
Border Punch - Martha Stewart
Organza ribbon, flowers and pearls - MeiFlower
The colours look much better 'in real life' the ribbon and flowers blend in more with the background, I just couldn't get a decent photo.

My second baby card is a Christening card, I used the same method as the previous one to make up the card, but used a shaper as the topper on the square side, and made a pop up stopper by adding a tab to the bottom of the stopper, cutting a slit into the base background paper, sliding in the tab of the stopper, sticking it down and then fixing the whole thing into place on the base of the easel card. The stopper folds flat for posting and then just pops up to hold the card open.


Image and papers - Baptism Angel kit - Clipart Fairy
Cross Image- Modern Heritage Natural Cross - Clipart Fairy
Wording - computer generated
Border punch - Martha Stewart
Ribbons, cross charm, pearl heart and pearls - MeiFlower

Well after three Clipart Fairy posts I am just about Clipart Fairy-ed out for this week LOL!.

Thanks for stopping by,
Hugs,
Colette xx


Sunday, 6 May 2012

A couple more Clipart Fairy cards

Here are two more Clipart Fairy cards, I have been busy trying to catch up with the Clipart Fairy stuff as I didn't get a chance to do any last week, which is why there are so many this weekend, I'll be back tomorrow as well with another two.

For this card I cut and folded a piece of A4 navy blue card to make a square card base and then decorated with various papers from the kit.

Image and papers - Izzy's Flower Wagon Kit - Clipart Fairy
Border punch - Martha Stewart
Sentiment - Computer generated
Oval Sentiment Tag - Marianne Craftables - Tags and Ticket
Ribbon, watering can charm and pearls - MeiFlower

For this card I printed two designs out onto a piece of A4 linen card, then cut in half to give me two A5 landscape pieces.  I trimmed a few centimetres from the right hand side of the card front and then used a border punch to shape the edge. I cut the same design from a strip of white card and fixed into place on the reverse, so that it left a little border on the front.
On the back piece I scored a line down from top to bottom approx 2.5cms in from the left hand edge, and then applied double sided tape to the small scored section, lined it up with the front piece and stuck it down. I always use this method to make an A5 landscape card from only one sheet of A4 card.
Image and all papers - Butterfly Bear - Clipart Fairy
Border Punch - Martha Stewart
Frame - Lea'bilities - Leanne 005 Frame curve
Flowers - CREAlies die CL CF 22
Tag - Sizzix - Tags Rounded
Leaf - Marianne Craftables - Anja's leaves 2
Ribbon and Crystals - MeiFlower

I'm going to a Christening today, so tomorrow I will show you the Christening card I made.

See you soon,
Colette xx

Saturday, 5 May 2012

Let's Dance!

Oh I do love a good dance, especially when I'm curled up on the sofa, drinking a glass of nice cool White Zinfandel, munching on maltezers and watching Strictly Come Dancing LOL!

Let's Dance is the name of the Clipart Fairy kit I used to make today's card.
I took the papers and image and made a window easel card (not sure what to call it so that will do), the image hangs free inside the card when opened. The stopper is attached through a slot in the base of the card, it folds flat for posting then you just pop it up to hold the card open. The fabulous flower is a digital download from Fred she Said


Papers and image - Let's Dance Interactive Kit - Clipart fairy
Dahlia - Fred she Said
Ribbon and Pearls - Meiflower

Side view

I'll be back tomorrow with some more Clipart Fairy goodies

Colette xx

Friday, 4 May 2012

I Love You so Much....

I bought the sentiment on this card on Wednesday evening and then just had to use it.


Image -TBB_120 - coloured in Photoshop
Papers - Clipart Fairy - Yummy 3 and more Yummy 3
Flower die - CREAlies CL CF 22
Foliage - Various Marianne dies ( new releases arrived this morning!)
Sentiment - Graphicat
Ribbon, pearls, button - Meiflower

I added my own wording inside the card to carry on the sentiment from the front.


and finally, I thought I would show you a close up of my flower, made with my latest CREAlies die and foliage made using the just released Marianne dies.


I will be entering this card into the following challenges

Digi Doodle Shop's Best - Anything goes
Crafting for all Seasons - #26 handmade flowers 
Paper Pretties  - PPC204 flowers
Paper Take Weekly - Anything Goes 
Fashionista Challenge -  Wedding, Wedding Anniversary, Wedding Shower.
Truly Madly Crafty Challenges -  Handmade Flowers
Make it Monday - always Anything Goes

That all for today folks, I'll be back tomorrow with some Clipart Fairy cards.

hugs,
Colette xx